Initial installation and testing
The purpose of this step is to download, install and configure UltraVNC to our liking. Once we have tested it, we can reuse the .ini configuration file for other computers. We will also import a registry setting from this test computer into the Group Policy Objects (GPO).
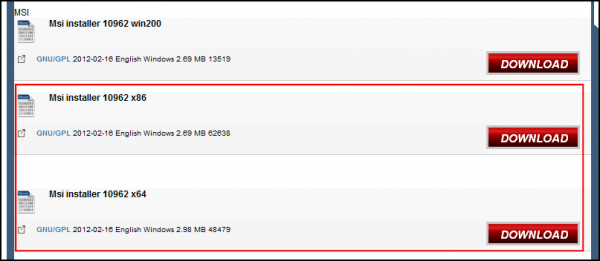
- Download the x86 and x64 Msi Installer packages from http://www.uvnc.com/downloads/ultravnc/100-download-ultravnc-10962.html
- Use the relevant .msi installer to install UltraVNC on a test computer. I’m using the x64 installer for a Win7 laptop.
- Configure UltraVNC with the desired settings, eg:
Note Require MS Logon is selected for Active Directory authentication.
- After making the configuration changes, restart the UltraVNC service (uvnc_service), or restart the computer.
- Confirm you can connect to the test computer:
Modifying the UltraVNC installer to exclude desktop/start menu shortcuts
In this step we’re going to stop the UltraVNC shortcuts from being added to the user’s desktop.
- Download and install Orca, or alternatively you can try http://www.instedit.com
- Open UltraVnc_10962_x86.msi within Orca.
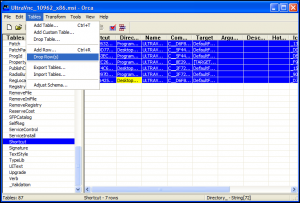
- Select the Shortcut table on the left, select all entries on the right, then select Drop Row(s) from the Tables menu:
- Click OK to confirm removal:
- Select File > Save.
- Now do the same for UltraVnc_10962_x64.msi.
Creating a software deployment path
We need to create a UNC path on the network to deploy the software from.
- Create a folder (eg. Deploy) and give Everyone, Full Control share permissions:
I always find it easier to give Full Control permissions to Everyone, then control access via NTFS Security permissions. It makes troubleshooting file access issues a breeze…well, not as bad anyway.
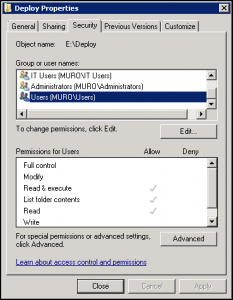
- Ensure the application users have a minimum of Read Security permissions (source):
- You should now have a UNC path of \\servername\Deploy.
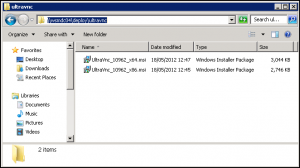
- Create a folder named ultravnc in the Deploy folder, then copy the modified .msi files from the previous section into the ultravnc folder:
Configuring the GPO to deploy UltraVNC
We will now create our Group Policy Object that will deploy the UltraVNC application.
There are 4 sub-sections to this:
There are 4 sub-sections to this:
- Add UNC path to .msi file.
- Copy the UltraVNC .ini file.
- Update the UltraVNC .ini file.
- Import registry settings.
Add UNC path to .msi file
- Create new GPO (eg. x64 UltraVNC Installation) and link it to an OU for testing:
- Right-click > Edit on the GPO and navigate to Computer Configuration > Policies > Software Settings > Software Installation.
- Right-click Software Installation and select New > Package:
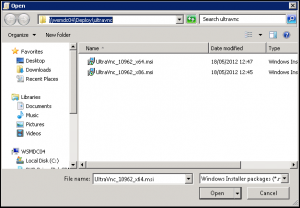
- Navigate to the UltraVnc_10962_x64.msi in UNC path, then click Open:
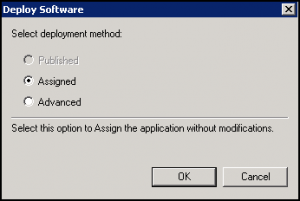
- Select Assigned, then click OK:
Copy the UltraVNC .ini file
- On the test computer, copy ultravnc.ini from C:\Program Files\uvnc bvba\UltraVnc to the UNC deployment path (\\servername\Deploy\ultravnc):
- Open the x64 UltraVNC Installation GPO and navigate to Computer Configuration > Preferences > Windows Settings > Files.
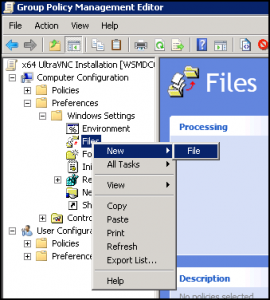
- Right-click Files and select New > File:
- Select Replace for the Action, enter the UNC path in the Source file(s) field, and %ProgramFilesDir%\uvnc bvba\UltraVnc\ultravnc.ini in the Destination File field:
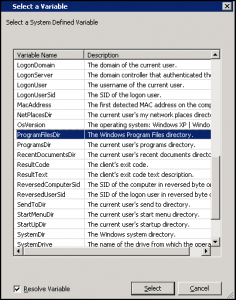
- If you want to use another variable for similar functions, you can view them by pressing F3 within the Source/Destination fields:
- Click OK to finish.
Update the UltraVNC .ini file
- Open the x64 UltraVNC Installation GPO and navigate to Computer Configuration > Preferences > Windows Settings > Ini Files.
- Right-click Ini Files and select New > Ini File:
- Select Replace for the Action, enter %ProgramFilesDir%\uvnc bvba\UltraVnc\ultravnc.ini in the File Path field, admin in the Section Name field, path in the Property Name field, and %ProgramFilesDir%\uvnc bvba\UltraVnc in the Property Value field:
- Click OK to finish.
Import registry settings
- Open the x64 UltraVNC Installation GPO and navigate to Computer Configuration > Preferences > Windows Settings > Registry.
- Right-click Registry and select New > Registry Wizard:
- Enter the name of the test computer, then click Next:
If an error occurs at this point, make sure the Remote Registry service is running on the test computer. - Navigate to HKEY_LOCAL_MACHINE/Software/ORL/WinVNC3/, tick the ACL key, then clickFinish:
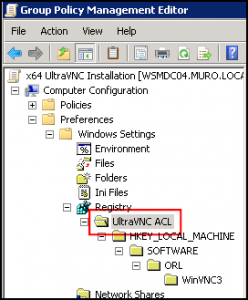
- Rename the label from Registry Wizard Values to something more useful, like UltraVNC ACL:
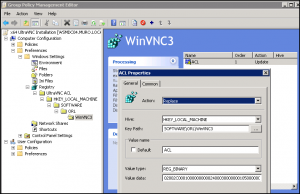
- Select the WinVNC3 sub-tree, double-click the ACL entry, then change the action to Replace:
Creating WMI Filters to select the correct GPO for 32-bit or 64-bit computers
- Under Group Policy Management, right-click WMI Filters and select New.
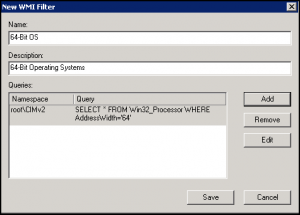
- Enter a new name, description, then click add.
- Leaving the default namespace, enter SELECT * FROM Win32_Processor WHERE AddressWidth=’64’:
- To target 32-bit computers, use Select * from win32_processor where addresswidth=’32’.
- If you need to troubleshoot, you can test your WQL queries using WMICodeCreator.
Setting the GPO scope
We need to set the scope so only the relevant computers will get the UltraVNC software.
- Select the x64 UltraVNC Installation GPO.
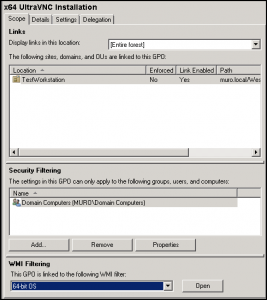
- Remove Authenticated Users and add Domain Computers to the Security Filtering section.
- Select 64-bit OS from the drop-down menu in WMI Filtering section:
Enabling CTRL+ALT+DEL for Win7
Almost there now! We finally have to enable the Win7 computers to accept CTRL+ALT+DEL commands from UltraVNC.
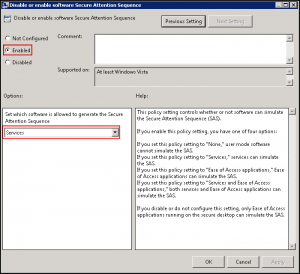
- Open the x64 UltraVNC Installation GPO and navigate to Computer Configuration > Policies > Administrative Templates > Windows Components > Windows Logon Options > Disable or enable software Secure Attention Sequence.
- Enable the policy and select Services from the Options drop-down menu:
- Job done!
Now you can put a few computers in the TestWorkstation OU, restart them, then test the VNC connection. All being well, you can link the GPO to a production OU.
Most of the above only covers targeting 64-bit computers, so don’t forget to follow similar steps for 32-bit computers.
Fonte: http://www.virtuallyimpossible.co.uk/deploying-ultravnc-within-an-active-directory-environment-using-group-policy/

Nenhum comentário:
Postar um comentário